Hey everyone, thanks for dropping by! I’m Jake, one of the lead techs here at our distribution cabinet company, and today I’m walking you through something we get asked about all the time: how to properly install a waterproof device in a distribution cabinet. Look, I know this stuff can feel super jargon-heavy if you’re not in the game, but I promise I’ll keep it real—no stuffy manuals, just what works from years of actually doing this, not just reading about it. Distribution Cabinet
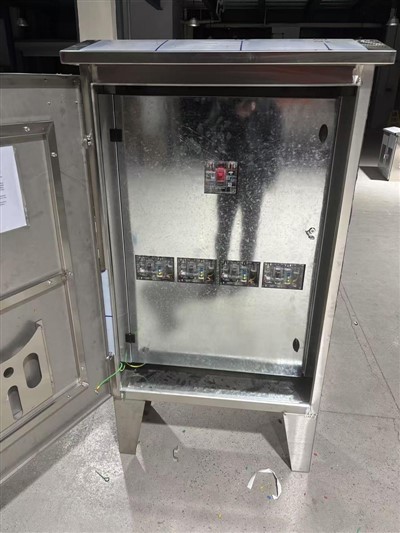
First, let’s cut to the chase. Why does this even matter? If you’ve ever seen a distribution cabinet that’s messed up because of water damage, you know it’s not a small problem. We’ve had customers call us panicking because their cabinets shorted out after a random rainstorm, or condensation built up inside during humid months, fried all the breakers, and shut down their whole shop floor. That’s why the waterproof device (we mostly use IP-rated breathers or gaskets, but more on that later) isn’t just an extra add-on—it’s what keeps your cabinet from turning into a very expensive paperweight. And as a cabinet supplier, we’ve tested more of these installs than I can count, so I’m gonna share the mistakes we see people make all the time, and how to nail it the first time.
Before you even grab a screwdriver, stop and prep. Skipping this step is like trying to bake a cake without preheating the oven—waste of time, and you’ll mess it up. First, you need to figure out what kind of waterproof device you actually need. Not all of these are the same, trust me. If you’re in a place with extreme temperature swings (like a warehouse that’s freezing at night and sweltering during the day), you need a breather valve. Why? Because when that hot air cools down, it creates a vacuum that pulls water in through tiny gaps—even if your cabinet looks sealed. A breather lets air equalize pressure without letting water or dust get in. If you just need to seal small gaps around cables or panel edges, a high-quality IP-rated gasket is the way to go. Skip the cheap stuff from the hardware store, by the way—we’ve tested off-brand gaskets that crumbled after one season of rain. Stick to ones rated at IP65 minimum; that’s the sweet spot for most outdoor or semi-outdoor cabinets.
Next, grab your tools, and make sure they’re the right ones. You don’t need a fancy toolbox full of gimmicks, but skip the flathead screwdrivers that’ll scratch your cabinet’s powder coat (we’ve had customers come to us with scratched cabinets because they used the wrong screwdriver, and we have to redo the finish—no fun). You’ll need a Phillips head screwdriver that fits the device’s screws perfectly, a drill with a step bit or hole saw (size matching the device’s mounting flange), a wire brush, isopropyl alcohol (70% works best, no rubbing alcohol from the dollar store), a clean rag, and a level? Wait, no—wait, for most installs, a tape measure to get the hole position is better. Also, wear nitrile gloves. Oil and dirt from your hands can mess up the adhesive or sealing surface, and even transfer onto the cabinet’s metal, leading to rust later. Not worth it.
Now, let’s get to the actual install step-by-step. Let’s start with the most common scenario: mounting a breather valve on the side of a standard steel distribution cabinet. This is what we do 90% of the time for new cabinets, and it works for retrofits too.
Step 1: Pick the right spot. This is make-or-break. You don’t want to mount it at the bottom of the cabinet, right? Because if water pools at the base, the breather’s vents will get covered. We always mount them 6 to 12 inches above the floor of the cabinet, on the side that’s least likely to get direct spray from rain or hoses (so not the side facing downspouts or garden hoses, obviously). Also, make sure it’s not behind a breaker bar or any other part that’ll block airflow—you need that air to move freely through the breather. Pro tip: mark the spot with a pencil first, then hold the breather up to make sure it’s aligned how you want it.
Step 2: Drill the hole. Once you’ve marked the spot, double-check the size. The breather’s packaging will say exactly what size hole you need—don’t guess. Grab your step bit or hole saw, put a piece of masking tape over the mark first. That stops the drill from slipping and leaving a ugly scratch on the cabinet. Drill slow, straight, don’t force it—if you push too hard, you’ll bend the metal or crack the bit. Once the hole’s drilled, use the wire brush to clean the edges of the hole. Any burrs or metal shavings here will make the breather sit unevenly, so the seal won’t work. You want that edge as smooth as a baby’s bottom.
Step 3: Clean, clean, clean. I can’t stress this enough. Take that isopropyl alcohol and the clean rag, and wipe the entire area around the hole—inside the cabinet where the breather will sit, the outer edge where the mounting flange will rest, and the edges of the hole. This gets rid of grease, dust, oil, or that residual factory grime that’s still on the cabinet. If there’s any gunk here, the adhesive or the gasket won’t stick, and you’ll have leaks down the line. We’ve had a customer call us back 2 months later because their breather fell off—turns out they skipped cleaning, and the adhesive just couldn’t stick to the dust on the metal. Avoid that.
Step 4: Mount the device. Now, take your breather. Most of them have either screw mounting or adhesive-backing, but for distribution cabinets, screw mounting is way more reliable for long-term use (adhesive works for small fixes, but if your cabinet’s exposed to vibration from trucks or heavy equipment, screws are non-negotiable). Peel off the protective liner from any adhesive if it’s a hybrid mount, then line the breather up with the hole you drilled, making sure the vent side is facing outward (you want water to hit the vents on the outside, not the inside of the cabinet). Start with the top two screws first, tighten them just enough to hold it—don’t crank them down like you’re fixing a flat tire. Over-tightening can crack the plastic breather or warp the metal flange, breaking the seal. Once the top two are good, do the bottom two, then double-check alignment. If it’s slightly off, loosen one screw a little, adjust, then re-tighten.
Wait, what about if you’re installing a gasket instead of a breather? Let’s cover that too, since that’s another common use case. Gaskets are for sealing around cable entry points, panel doors, or small gaps between cabinet components. The process is similar, just smaller scale. For cable glands, you cut the gasket to fit the cable’s diameter (most gasket kits come with pre-cut sizes, but if you need to trim it, use a sharp utility knife, not scissors—scissors leave frayed edges that leak). Clean both the gasket surface on the cabinet and the back of the gasket, then press it firmly into place, making sure there are no air bubbles or gaps. If it’s for a panel door, make sure the gasket sits evenly all around the edge of the door, and that the door closes flush—if there’s a gap between the gasket and the cabinet frame, water will seep through.
Now, the post-install checks. You don’t just drill a hole and call it a day, okay? This is the part that catches 99% of the hidden mistakes. First, do a visual check. Step back, make sure the breather is straight, all screws are tight, there are no gaps between the flange and the cabinet. Run your finger around the edge of the breather to feel for any dips or spots where it’s not sitting flat. Next, the pressure test? Wait, no—for small jobs, a simple water test works. Grab a spray bottle with clean water, spray the outside of the cabinet around the new waterproof device, then wait 15 minutes, then open the cabinet and check if any water got in. This is way easier than fancy pressure testing kits, and it’s enough to catch a bad seal. If you see a drop of water inside, that means the breather wasn’t mounted right—take it off, re-clean the area, re-mount it, and test again.
Also, a quick note for retrofits. If you’re adding a waterproof device to an existing cabinet that’s already installed on site, not a brand new one coming off our production line? Just adjust the steps a little. Mark the spot a little higher to avoid any rust spots on the existing cabinet metal (old cabinets sometimes have corrosion that messes with adhesion), and when you drill the hole, put a dab of anti-rust paint on the inner edge of the hole before mounting the breather—prevents that small hole from turning into a rust spot later. We learned that the hard way with an old customer’s cabinet that had a tiny rust spot form around a breather we installed 6 months prior, so now we always recommend that for retrofits.
Wait, let’s talk about the mistakes I’ve seen people make, because that’s what’s actually useful here. First, using the wrong IP rating. I had a guy call us last year bragging he saved $5 by buying a IP54 breather, only to have water leak in during a heavy downpour. IP54 is dust-protected and splashed-proof, but IP65 is for low-pressure water jets, which is what you need for outdoor cabinets. Don’t skimp here. Second, drilling the hole in the wrong spot. I saw a tech mount a breather at the bottom of a cabinet once, and when the floor flooded a little during a storm, the breather was sitting in a puddle, so water got sucked right in when air equalized. Never mount below the midpoint, guys. Third, skipping the cleaning step. Like I said earlier, this is the #1 mistake. Even a tiny patch of dust can make the seal fail. Fourth, over-tightening screws. I’ve had to replace 3 breathers in one week because people cranked the screws so hard the plastic cracked. Tight is good, hand-tight plus a quarter turn is perfect, no more.
And before I wrap up, a quick note from a cabinet supplier perspective. When we sell distribution cabinets, we include pre-cut, pre-marked spots for waterproof devices on our standard models for exactly this reason—makes install way easier for our customers. But if you’re retrofitting or installing on a custom cabinet, the steps I walked you through work every time. The key here is that this isn’t rocket science—it’s about being thorough, not cutting corners.

If you’re working on a project and need distribution cabinets that are built to handle these waterproof installs, or you have questions about sizing devices for your specific setup, hit us up to connect with our team for a procurement chat. We don’t do generic sales pitches—we talk about what you actually need, no fine print, no hidden fees. Just real solutions for your cabinet needs.
Distribution Cabinet References:
- IP Rating Standards, International Electrotechnical Commission (IEC 60529)
- Distribution Cabinet Environmental Protection Guidelines, National Electrical Manufacturers Association (NEMA)
- Best Practices for Mounting Electrical Enclosure Breathers, Automation Direct Technical Bulletin 2022-04
Anhui Nanxian Electric Co., Ltd.
With abundant experience, we are one of the most professional distribution cabinet manufacturers and suppliers in China. We warmly welcome you to buy advanced distribution cabinet for sale here and get quotation from our factory. All customized products are with high quality and low price.
Address: Factory Unit 03-2, Building 21, Feidong Yinfeng Industrial Park Co., Ltd., Northeast Corner of Manquan Road and Changle Road, Hefei Circular Economy Demonstration Park, Feidong County, Hefei City, Anhui Province.
E-mail: 541580567@qq.com
WebSite: https://www.nxelepower.com/
